Replacing Your CR1000 Datalogger with a CR1000X: What You Should Know
by Timothy Jeppsen | Updated: 10/11/2017 | Comments: 8
Blog Topics
Area / Application


Product Category


Corporate / News
Search the Blog
Blog Languages
Subscribe to the Blog
Get an email when a new article is posted. Choose the topics that interest you most.
Suggest an Article
Is there a topic you would like to learn more about? Let us know.

As soon as people learned that we were replacing the CR1000 datalogger with the CR1000X datalogger, they asked us these questions: “Can I load a program I wrote for my CR1000 into a CR1000X?” and “Will the CR1000X fit in the same space as my CR1000?”
Easy answer—yes, mostly. Let me explain. The upgrade improvements in the CR1000X are not simply cosmetic. The CR1000X is a completely new product from the ground up. However, because the programming and functions are very similar between the CR1000X and CR1000, the replacement is fairly straightforward.
In the following sections, I’ll highlight the similarities and differences of the two data loggers that you should know about.
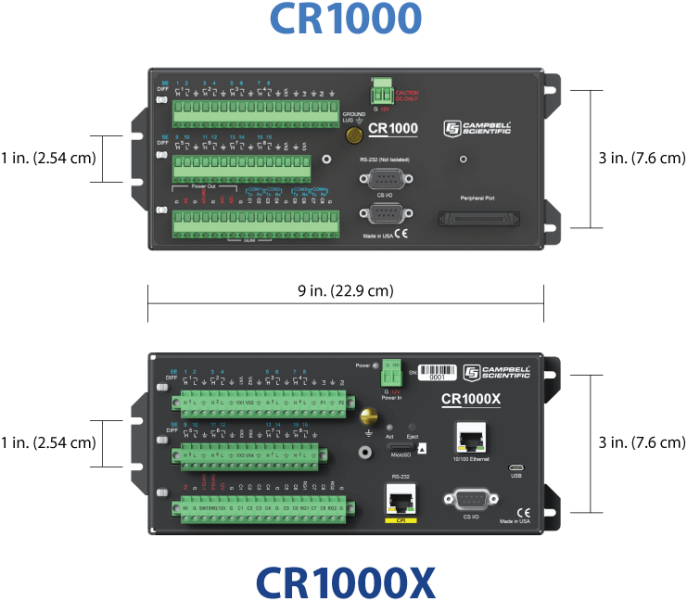
Size
Physically, replacing a CR1000 with a CR1000X is simple. The size of the CR1000X is the same as the CR1000.
Wiring Panel
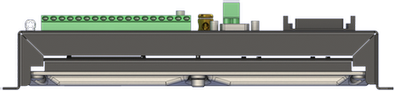
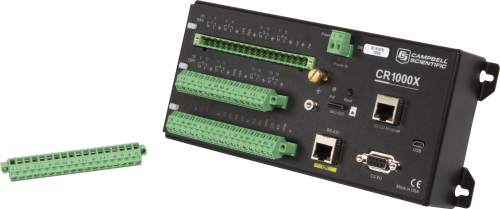
Here is where things get different. Removable terminal strips on the CR1000X wiring panel provide a quick and effective way to quickly swap data loggers without removing sensor wires or the entire wiring panel. The complete wiring panel and data logger are still separate components. Like the CR1000, the CR1000X is in a sealed, protective enclosure, shielded from direct electrical damage through the terminal and port connectors. The wiring panel becomes the first line of protection for the data logger. This increases the probability that the data is saved if catastrophic damage should occur. And in most cases, the repairs are limited to the wiring panel.
CR1000 Wiring Panel
CR1000X Wiring Panel with Terminal Strip Removed
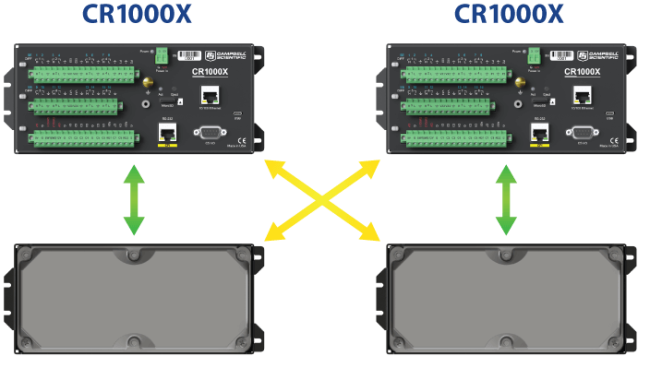
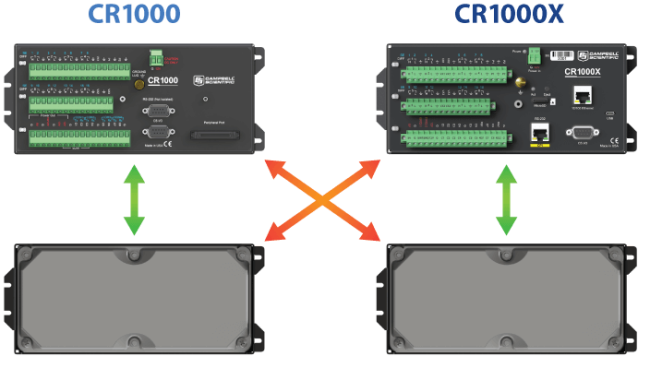
The CR1000X wiring panel is not generally intended to be interchanged with another CR1000X wiring panel.
Because the CR1000X can measure analog current directly (0 to 20 mA or 4 to 20 mA), the wiring panel is not designed to be interchangeable.
If the wiring panel of the CR1000X becomes damaged and a new wiring panel is required, the CR1000X wiring panel must be calibrated with the CR1000X measurement module to maintain current-measurement accuracy.
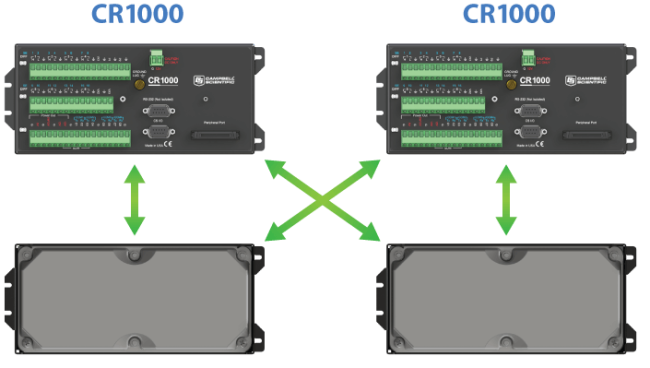
The CR1000 wiring panel can be interchanged with another CR1000 wiring panel.
For the CR1000, any wiring panel can be used with any CR1000 datalogger.
The CR1000X and CR1000 wiring panels cannot be interchanged.
- The CR1000X wiring panel cannot be used with a CR1000 measurement module.
- The CR1000X measurement module cannot be used with a CR1000 wiring panel.
Programming
Although there are significant additions to the CR1000X program instructions that are not available in the CR1000, in most cases you can load your program written for the CR1000 into a CR1000X with minor instruction changes. The most notable of these changes is in the analog measurement instructions. I will use the Differential Measurement, VoltDiff(), to illustrate.
| Parameter | CR1000 | CR1000X | ||||||||||||||||||||||||||||||||||||||||||||||
|---|---|---|---|---|---|---|---|---|---|---|---|---|---|---|---|---|---|---|---|---|---|---|---|---|---|---|---|---|---|---|---|---|---|---|---|---|---|---|---|---|---|---|---|---|---|---|---|---|
| VoltDiff(Dest,1,mV5000,1,True ,0,_60,1.0,0) | VoltDiff(Dest,1,mV5000,1,True ,0,60,1.0,0) | |||||||||||||||||||||||||||||||||||||||||||||||
| Dest | The Dest parameter is a variable in which to store the results of the measurement. | Same as the CR1000. | ||||||||||||||||||||||||||||||||||||||||||||||
| Reps | The Reps parameter is the number of times the measurement should be made. Measurements are made on consecutive channels. If the Reps parameter is greater than 1, the Dest parameter must be a variable array. | Same as the CR1000. | ||||||||||||||||||||||||||||||||||||||||||||||
| Range | The Range parameter is the expected voltage range of the input from the sensor. The following range options are available:
|
The Range parameter is the expected voltage range of the input from the sensor. The following range options are available:
|
||||||||||||||||||||||||||||||||||||||||||||||
| DiffChan | The DiffChan parameter is the number of the differential channel on which to make the first measurement. If the Reps parameter is greater than 1, the additional measurements will be made on sequential channels. | Same as the CR1000. | ||||||||||||||||||||||||||||||||||||||||||||||
| RevDiff | A constant is entered for the RevDiff parameter to determine whether the inputs are reversed and a second measurement made. This function removes any voltage offset errors due to the data logger measurement circuitry, including operational input voltage errors.
|
Same as the CR1000. | ||||||||||||||||||||||||||||||||||||||||||||||
| SettlingTime | The SettlingTime parameter is the amount of time to delay after setting up a measurement and before making the measurement. | Same as the CR1000. | ||||||||||||||||||||||||||||||||||||||||||||||
| Integ (for CR1000) fN1 (for CR1000X) |
The Integ parameter is the amount of time, in microseconds, to integrate a signal for the channel being measured. Three options are available:
|
The fN1 (first notch frequency) parameter determines the lowest frequency that will be eliminated or notched out by the sinc filter. Any value between 5 Hz and 93.75 kHz can be entered, but common options for filtering noise are the following:
|
||||||||||||||||||||||||||||||||||||||||||||||
| Mult, Offset | Both the Mult and Offset parameters are a constant, variable, array, or expression by which to scale the results of the measurement. With a multiplier (mult) of 1 and an offset of 0, the output is in millivolts. | Same as the CR1000. |
Recommended for You: For programming assistance, watch the "CRBasic | Help System" video.
Converting a CR1000 Program to a CR1000X Program
There are two quick ways I use to convert a CR1000 program to a CR1000X program.
Option A
- Rename the CR1000 program file name extension to .CR1X. For example, if your CR1000 program file is Temp.CR1, rename it to Temp.CR1X.
- After this file is renamed, open it with the CRBasic Editor.
- Change the comment line at the beginning of the program instruction from 'CR1000 Series Datalogger to 'CR1000X Series Datalogger, and then compile the program. (This is not necessary for the program, but it is good practice to have correct comments in your programs.)
- When you compile this program, the errors will be indicated. Edit these errors, and the program will compile correctly. (For help, watch the error-checking segment [5:55] of the "CRBasic | Common Errors" video.)
Option B
- Open the CR1000 program file in the CRBasic Editor, and copy all the instructions in the program.
- Create a new program for the CR1000X in the CRBasic Editor.
- Delete all the lines of instruction in the program, and copy all the lines of instruction from the CR1000 program.
- Change the comment line at the beginning of the program instruction from 'CR1000 Series Datalogger to 'CR1000X Series Datalogger, and then compile the program. (This is not necessary for the program, but it is good practice to have correct comments in your programs.)
- When you compile this program, the errors will be indicated. Edit these errors, and the program will compile correctly. (For help, watch the error-checking segment [5:55] of the "CRBasic | Common Errors" video.)
Conclusion
Replacing your current CR1000 dataloggers with our new CR1000X dataloggers should be a fairly straightforward process, and I hope the information in this article is helpful to you. If you have any questions I didn’t address, please post them below.


About the Author
 Timothy Jeppsen is the Senior Marketing Manager at Campbell Scientific, Inc. He began his Campbell Scientific career as an applications specialist specializing in aquaculture applications and has also held positions as a sales specialist, manager of the Water Resources Group, and Marketing Product Manager for data loggers and communications products. Timothy received his bachelor’s degree in marketing from Utah State University and his master’s degree in quantitative genetics from Auburn University.
Comments
Ekpyro | 09/23/2018 at 03:52 PM
With the CR1000, one could use 'Com2' as the communication port for the 'SerialOut' instruction, and this would transmit on pin C3. This appears to have changed with the CR1000X. How can one convert this line for CR1000X?:
`SerialOut(Com2, ...`
Robin D | 09/24/2018 at 12:22 PM
Thanks for asking, Ekpyro. Be sure to specify COMC3 for the port. Using this will work just like it did for the CR1000.
kirving | 09/25/2018 at 02:00 PM
In getting my first CR1000X program to compile, after using CR1000 for some time, I see there are a few differences, including 'Com1' changing to 'ComC1' as mentioned above. Another difference seems to be that control port references, e.g. in the portSet() instruction, use 'C3' vs '3' for the CR1000. I don't see any mention of this in the pdf manual. Is a resource describing programming details available for the CR1000X?
Big Fish | 09/26/2018 at 08:47 AM
You are correct, other than what is mentioned in the blog, there is not a resourece available that describes the programming in detail.
Ron Muzzi | 04/10/2019 at 08:54 AM
The PulseCount instruction was also changed and is not backward compatible. Specifically, the PConfig option uses different values than the CR1000. It would be helpful if you would provide a document that simply lists all the instructions that have changed, especially those that are not backward compatible. It wouldn't even need details about the change, as we can figure that out from the CRBasic Editor help system. Thanks!
Big Fish | 04/10/2019 at 11:02 AM
Great suggestion. I will make sure we post the list.
asaha | 06/28/2022 at 07:42 PM
Neither option works for me :( The CRBasic editor in my loggernet 4.4.2 does not have a way to compile for CR1000X, only CR1000. Likewise the Short Cut does not have a CR1000X option while setting up a new program. So i downloaded Loggernet patch 4.7, but that threw up an error saying "Unable to verify version of Installed application". Catch 22 - so now i await an answer from the good people of Campbell Sci.
TBrown | 06/28/2022 at 09:28 PM
@asaha, have you started a case for this with our support group? If not, please submit a web request or call 435-227-9100 and we will help you troubleshoot this error. Thanks.
Please log in or register to comment.